


How to Lay Mexican Saltillo Tile on a Wood Subfloor
May 30, 2019 Rustico Tile Staff All Blogs, Cantera Stone, Cement Tile, Installation Guide & Products, Saltillo Tile, Sealing Tile Cleaners, Installation Guide, Manganese Saltillo Tile, saltillo tile Social Share

How to Lay Mexican Saltillo Tile on a Wood Subfloor
Guidelines & Recommendations
Many variations to the following steps may exist for your specific project space and tile. Consult with your local contractor or tile installer for more precise advice relevant to your tile project.
Click here to view instructions for how to install Saltillo tile on a concrete slab.
Rustico Tile & Stone is not responsible for Saltillo tile installations not completed by one of our contracted installers. We do not provide advice via phone or email for tile that has not been purchased from Rustico Tile & Stone.
Consider our How to Install Saltillo Tile eBook available on Amazon for a complete set of instructions.

Now for the fun stuff… How to Lay Mexican Saltillo Tile
- Prep the subfloor. Some options for prep include hardibacker, lath sheet, concrete, or DITRA. Our installers prefer to use our Crest Crack Isolation & Waterproofing membrane. For complex and/or commercial jobs, Ditra is a great option, though more expensive.
- Next, Apply thinset (we recommend Crest Porcelanato or Crest Gran Formato). If using the DITRA product mentioned above, you do not need an elastic thinset. We recommend semi-modified or fully-modified thinset, which can be found at a local home improvement store. ½” x ½” trowel is recommended for a basic 12×12 size saltillo tile. For other sizes, consult with your installer.
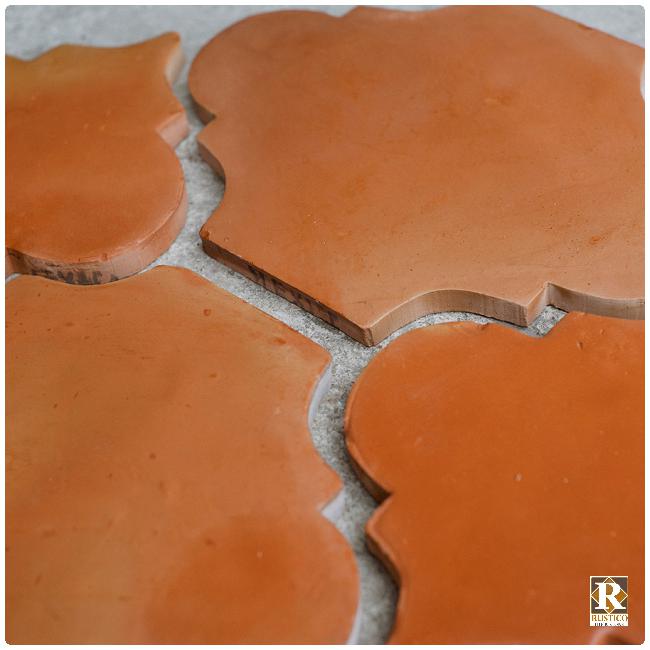
- Now, lay the terracotta Saltillo tile (assuming it is presealed. If it is unsealed, see tips at the bottom of this guide). With a standard 12×12 size tile, a minimum grout line recommended is ½”. Any wider grout line is for cosmetic purposes. We do not recommend using spacers with authentic handmade Saltillo tile to allow for size/shape variations. Your installer pays attention to detail to keep the tile layout and spacing consistent. This is not a complicated process. Cut Saltillo tile with a wet saw.
- Grout Saltillo tile floor after thinset dries (usually an overnight waiting period). Recommended grout includes a sanded grout or mortar mix. This can also be found at a local home improvement store. Check out more Saltillo Tile Grout Tips.
- Clean Saltillo tiles. You must clean your Mexican tile floor thoroughly to remove any grout haze or debris accumulated during installation. Then, allow the Saltillo tile floor to dry for several days. Our StoneClean 104 cleaner, water, and a sponge or brush can be used for cleaning the floor. If you choose to you any other type of chemical cleaner, follow this step with a few mop-washes of a 50/50 mixture of acetone and water. Any residual cleaning chemical must be fully removed before applying your top coat of Saltillo tile sealer.
- Finally, Seal the Saltillo tile floor. Once your installation is complete, cleaned, and thoroughly dried, you can now apply the top coat of tile sealer. An ideal topcoat sealer will last several years and can also be applied to the terra cotta grout lines. We recommend Crest or TerraNano topcoat sealer. Allow the terra cotta sealer to dry fully and cure. Once cured, installation is complete.
A few tips:
- Save $$ and time. Check out Why You Should Buy & Install only Sealed Saltillo Tile.
- Do not soak presealed Saltillo tile before installation. Just don’t. Ever.
- If you are installing unsealed Saltillo tile, you can soak these before installation or apply several coats of Saltillo tile sealer before installation. It’s better to seal the tiles than to soak the tiles.
- Do not dry stack Saltillo tile in installation.
More Resources: