


How to Seal Saltillo Tile (Updated) | Mexican Tile Cleaning & Maintenance
August 14, 2020 Rustico Tile Staff All Blogs, Cantera Stone, Cement Tile, Installation Guide & Products, Sealing Tile Cleaners, Installation Guide, saltillo tile, Terra Cotta Floor tile Social Share
- How to Seal Saltillo Tile Flooring: A DIY Guide
- Topcoat Sealer vs. Penetrating Sealer: The Process is (Almost) the Same
- Floor Prep & Materials
- Sealing Unsealed Saltillo Tile: The Basic Process
- How to Apply Topcoat Sealer (Less is More)
- Drying Time After Sealing Saltillo Tile
- Watch the How to Seal Saltillo Tile Video
How to Seal Saltillo Tile Flooring: A DIY Guide
Disclaimer: Our recommendations are hinged on the Saltillo tile sealer and Saltillo tiles being supplied by Rustico Tile & Stone. Consult your tile distributor for products and guidance applicable to your job site. Also, these guidelines are based on sealing Saltillo tiles that are already installed as flooring.
Topcoat Sealer vs. Penetrating Sealer: The Process is (Almost) the Same
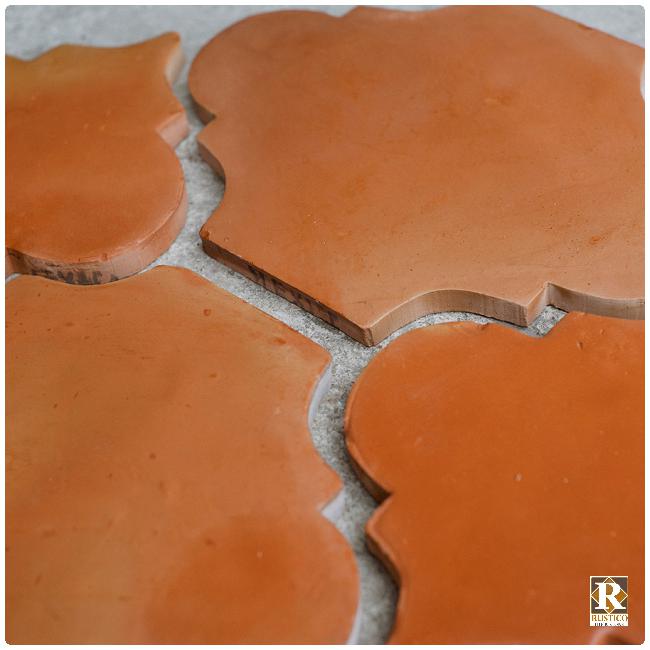
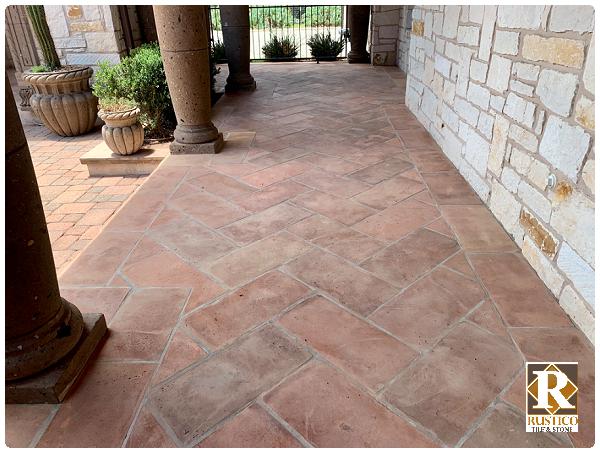
This is an unsealed Manganese Saltillo tile floor. It’s clean and dry – ready for coats of sealer.
What’s the difference between “topcoat sealer” and “penetrating sealer?”
In our manufacturing process, we produce a solvent-based sealer that is applied to our unsealed Saltillo tiles in 5+ coats. For various reasons, we always recommend buying presealed Saltillo tiles instead of unsealed tiles. At Rustico, the price difference between sealed and unsealed tiles is negligible. So, it’s a better long-term value to buy our presealed tiles. Once the presealed tiles are installed, apply the finishing “topcoat” sealer.
Why apply topcoat sealer if the tiles are already sealed? Great question!
Topcoat sealer provides the final cosmetic coat across the floor (i.e., a gloss or satin finish). But functionally, it’s critical to reduce ongoing maintenance of Saltillo tile floors.
High-quality Saltillo tile topcoat sealer adds scratch resistance, UV protection, and extra water resistance, and it seals the grout (if applied in our process below). Additionally, that final coat of sealer removes scuffs that occur to the penetrating sealer during the grouting, handling, and shipping process.
So, the next most logical question is… how often do I have to reseal my Saltillo tile floor?
That answer is dependent on the quality of the topcoat sealer chosen for the finishing coat. We only work with long-lasting sealers. Some range from 3-5 years, while our best sealer has a 10-15 year lifespan.
→ Learn More about our Topcoat Sealers for Saltillo Tile.
→ Learn More about how to save money and Why to Buy Sealed Saltillo Tiles.
Floor Prep & Materials
By learning how to seal Saltillo tile following our process, only a few installation materials are required.
To seal unsealed Saltillo tile, have these things handy.
- Sealer of choice (we like solvent-based sealers on unsealed tiles due to the natural and rich color enhancement to the raw clay tiles)
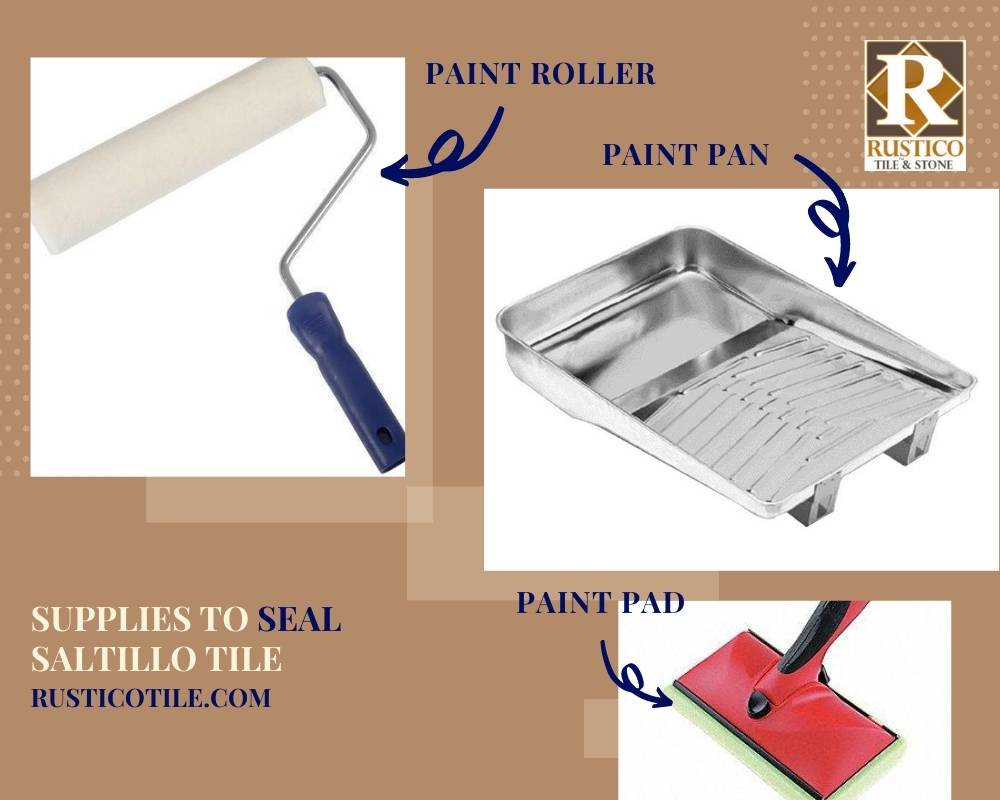
- Paint pan
- Short-napped paint rollers and long application pole
- Protective clothing and mask
- Clean-up materials based on the sealer manufacturer’s recommendations
You need most of the same things to apply topcoat sealer to presealed Saltillo tiles.
- Sealer of choice (we like our Crest or TerraNano sealers).
- Pro Tip: Topcoat sealer must be chemically compatible with any other penetrating sealer already coated into the clay tile. This is very important. If the penetrating sealer is unknown, test a topcoat sealer thoroughly and allow it to cure for several days fully.
- Paint pan
- Rectangular paint pads and long application pole
- Protective clothing and mask
- Clean-up materials based on the sealer manufacturer’s recommendations
The only difference between sealing unsealed and presealed tiles is the applicator – paint roller vs. paint pad.
Sealing Unsealed Saltillo Tile: The Basic Process
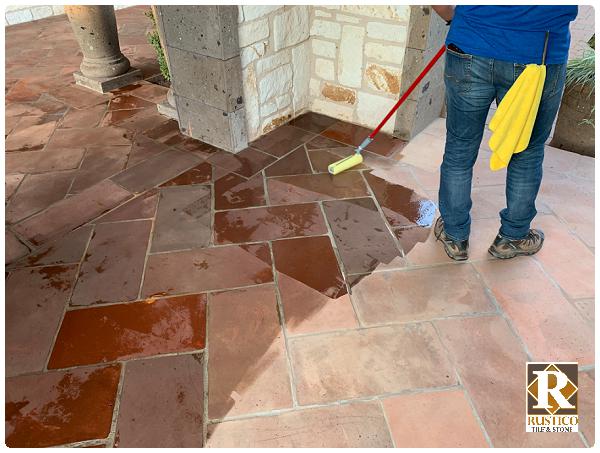
The roller application is ideal when multiple coats must be applied. Notice the quick absorption of sealer into the clay with this first coat of sealer.
The process of sealing Saltillo tile is similar to painting a wall. But because unsealed Saltillo tile is very porous, it requires multiple coats of a penetrating sealer. That penetrating sealer (solvent-based) enhances color and fortifies the tile as it soaks into the clay.
Once the unsealed Saltillo tile floor has adequate coats of sealer, apply the finishing topcoat sealer for scratch resistance, UV protection, added water resistance and to seal the grout.
Starting with Unsealed Tile
- Pour small amounts of sealer into a paint pan.
- Dip and rotate the paint roller to load the roller.
- Swipe the paint roller across the floor, working small sections at a time. You’ll notice very quickly that Saltillo tile sealer soaks into the clay tiles.
- Follow dry time recommendations from the sealer manufacturer.
- Reapply as necessary.
- Notice the color variations throughout the Saltillo tile flooring area are inconsistent until adequate coats of sealer have been applied evenly.
- Pro Tip: To test whether enough coats of sealer have been applied, pour a little water in several areas of the floor and grout. If water seeps into the surface, another coat of sealer is required.
Notice the color enhancement of solvent-based sealer on unsealed Manganese Saltillo tile.
How to Apply Topcoat Sealer (Less is More)
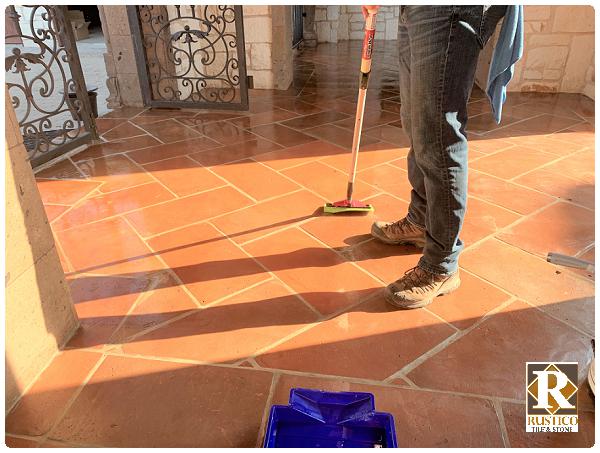
Use a paint pad to apply topcoat sealer to reduce streaks, marks, & bubbles.
The process for applying topcoat sealer to Saltillo tile is similar to the process for how to seal unsealed Saltillo tile. But there are two exceptions.
- Switch the application device to a paint pad.
- Normally, only one coat is necessary.
Follow these steps to apply topcoat sealer to Saltillo tile floors.
- Pour a small amount of sealer into a paint pan.
- Dip the paint pad lightly into the Saltillo tile sealer.
- Swipe the paint pad (lightly) across the tile floor. Do not allow sealer to puddle in grout lines. If puddling occurs, swipe again to spread the sealer evenly.
- Rustico Tile & Stone topcoat sealers are high-quality. Follow the ideology that “less is more.” One thin coat should cover approximately 400 square feet of flooring area if the tiles are adequately presealed with the penetrating sealer.
- Allow the Saltillo tile sealer to dry according to manufacturer instructions.
- Pro Tip: These are the most important questions to ask about Terracotta tile.
Drying Time After Sealing Saltillo Tile
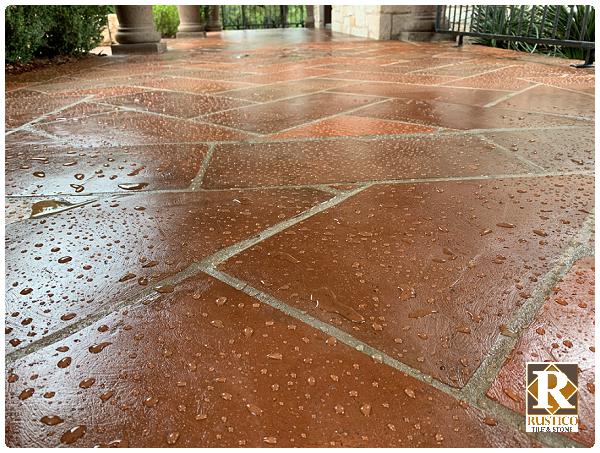
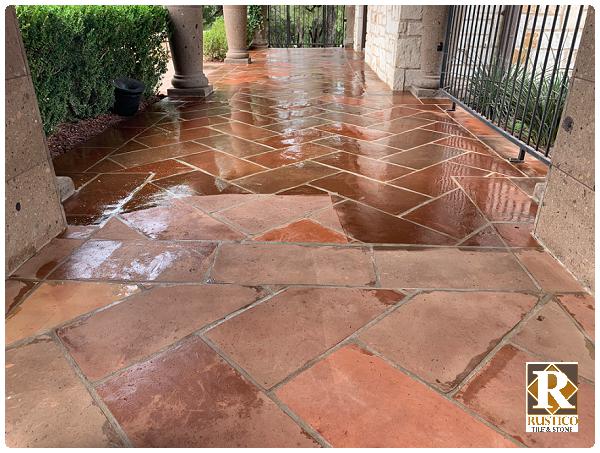
The water (rain!) test illustrates that this Manganese Saltillo tile is adequately sealed. It’s ready for the next step of topcoat sealer.
- Heed temperature recommendations in the manufacturer’s instructions. Most sealers cannot be applied to surface areas above 80-85 degrees or below 65 degrees. Check the manufacturer’s instructions.
- Adequate drying times are essential to proper adherence and for the curing effect of the sealer. Allow enough time between coats. In our solvent-based penetrating sealer method, we allow 2+ hours of drying time between coats. More time may be needed after multiple coats are applied. Use common sense and follow the manufacturer’s instructions.
- The floor must be completely dry and clean before applying the Saltillo tile sealer. This also means that grout in a fresh tile installation must be dry. Our crew usually applies topcoat sealer to a new Saltillo tile floor 3-5 days after the floor has been grouted and cleaned.
- Change out the paint pad and paint roller frequently to keep a clean and evenly distributed application. You’ll know when these need to be changed!
- Do not apply a sealer if rain is in the 24-48 hour forecast (for outdoor applications).
- For outdoor applications, turn off sprinklers until the sealer is completely dry.
- The curing process (hardening) for some sealers can take several days. Do not drag furniture or heavy objects across the floor until curing is complete.
- Pro Tip: Don’t drag things across the tile floor (ever). While our topcoat sealers have strong ratings for scratch resistance, they are not scratch-proof. Use common sense to preserve the life of your sealed Saltillo tile floor.
- An anti-slip additive (Shark Grip or others) may be added to the sealer if a non-slip surface finish is desired. Follow the manufacturer’s instructions.
- Most people find that the wide grout lines in a Saltillo tile floor provide enough texture for slip resistance. Or consider our Antique Saltillo tile for a natural non-slip surface area with its textured surface.
Finally, we can’t emphasize this enough…
Your floor must be thoroughly clean and dry before applying any sealer. Removing the sealer is very difficult, so do it correctly the first time! Don’t mess up. ☺ (We offer the same advice for sealing Cement tiles, too!)
→ If you are in a situation where your Saltillo floor must be stripped, check out our post about How to Strip Saltillo Tile (& Why You Should Avoid Doing it if Possible!)
Watch the How to Seal Saltillo Tile Video
Once again, defer to your local contractor or flooring professional for guidelines specific to your job site.
→ For cleaning tips, check out How to Clean Mexican Saltillo Tile Floors.
When a Saltillo tile floor is sealed properly with enough coats of penetrating sealer and high-quality topcoat sealer, you’ll enjoy a low-maintenance floor for many years!